k8sgpt官方文档:In-Cluster Operator - k8sgpt
localai官方文档:Run with Kubernetes | LocalAI documentation
参考文献:K8sGPT + LocalAI: Unlock Kubernetes superpowers for free! | by Tyler | ITNEXT
安装LocalAI
可选一:(kubectl方式)
cat > local-ai.yaml << EOF
apiVersion: v1
kind: Namespace
metadata:
  name: local-ai
---
apiVersion: v1
kind: PersistentVolumeClaim
metadata:
  name: models-pvc
  namespace: local-ai
spec:
  storageClassName: nfs-storage # 实际的storageclass
  accessModes:
    - ReadWriteOnce
  resources:
    requests:
      storage: 10Gi
---
apiVersion: apps/v1
kind: Deployment
metadata:
  name: local-ai
  namespace: local-ai
  labels:
    app: local-ai
spec:
  selector:
    matchLabels:
      app: local-ai
  replicas: 1
  template:
    metadata:
      labels:
        app: local-ai
      name: local-ai
    spec:
      containers:
        - env:
          - name: DEBUG
            value: "true"
          name: local-ai
          #image: quay.io/go-skynet/local-ai:latest
          image: quay.io/go-skynet/local-ai:master-ffmpeg-core
          imagePullPolicy: IfNotPresent
          volumeMounts:
            - name: models-volume
              mountPath: /build/models
      volumes:
        - name: models-volume
          persistentVolumeClaim:
            claimName: models-pvc
---
apiVersion: v1
kind: Service
metadata:
  name: local-ai
  namespace: local-ai
spec:
  selector:
    app: local-ai
  type: LoadBalancer
  ports:
    - protocol: TCP
      port: 8080
      targetPort: 8080
EOF
kubectl apply -f local-ai.yaml可选二:(helm方式)
helm repo add go-skynet https://go-skynet.github.io/helm-charts/
helm show values go-skynet/local-ai > values.yaml
vim values.yaml
replicaCount: 1
deployment:
image:
repository: quay.io/go-skynet/local-ai
tag: latest # latest镜像23.5G
# tag: master-ffmpeg-core
env:
threads: 8 # 最好8cpu
context_size: 512
modelsPath: "/models"
download_model:
image: busybox
prompt_templates:
image: busybox
pullPolicy: IfNotPresent
imagePullSecrets: []
resources: {}
promptTemplates: {}
models:
forceDownload: false
list:
- url: "https://gpt4all.io/models/ggml-gpt4all-j.bin" # 提前下载,放到models的pvc里
# basicAuth: base64EncodedCredentials
initContainers: []
sidecarContainers: []
persistence:
models:
enabled: true
annotations: {}
storageClass: nfs-storage # 实际的storageclassName
accessModes: ReadWriteMany
size: 10Gi
globalMount: /models
output:
enabled: true
annotations: {}
storageClass: nfs-storage # 实际的storageclassName
accessModes: ReadWriteMany
size: 5Gi
globalMount: /tmp/generated
service:
type: ClusterIP
port: 80
annotations: {}
ingress:
enabled: false
className: ""
annotations: {}
hosts:
- host: chart-example.local
paths:
- path: /
pathType: ImplementationSpecific
tls: []
# - secretName: chart-example-tls
# hosts:
# - chart-example.local
nodeSelector: {}
tolerations: []
affinity: {}helm install local-ai go-skynet/local-ai -f values.yaml下载模型
GPT4all-j下载地址(3.52G):https://gpt4all.io/models/ggml-gpt4all-j.bin
下载后安装到models的pvc下
测试LocalAI GPT4All模型
curl http://10.20.13.140:27410/v1/models
curl http://10.20.13.140:27410/v1/chat/completions -H "Content-Type: application/json" -d '{
  "model": "ggml-gpt4all-j.bin",
  "messages": [{"role": "user", "content": "How are you?"}],
  "temperature": 0.7
}'
安装k8sgpt客户端,诊断集群
rpm -ivh -i k8sgpt_amd64.rpmk8sgpt auth add --backend localai --model ggml-gpt4all-j.bin --baseurl http://10.20.13.140:27410/v1k8sgpt analyze --explain -b localai # 如果这一步卡住,很可能你的资源问题不能被确认
k8sgpt analyze --explain -b localai --filter Pod # 只过滤Pod
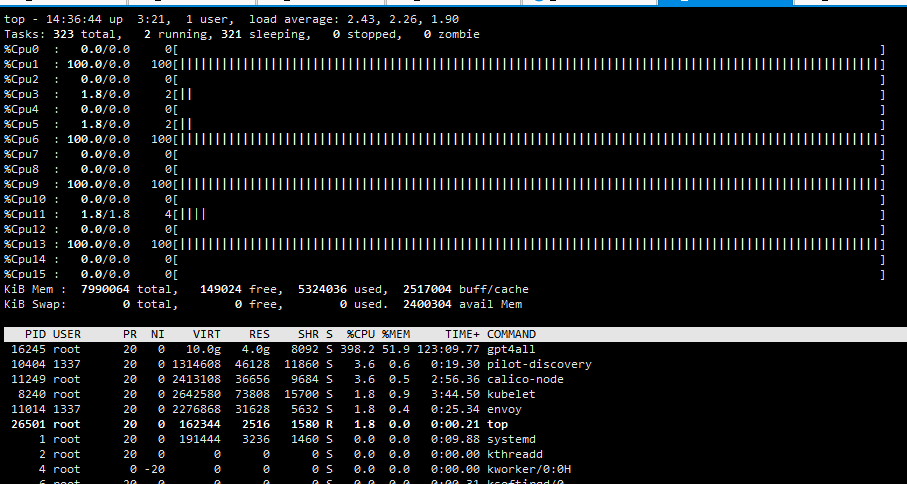
资源使用问题

查看local-ai的pod在node01节点,如果正在运算可以看到top使用率

集成k8sgpt-operator配置自动诊断
安装k8sgpt-operator
helm repo add k8sgpt https://charts.k8sgpt.ai/
helm repo update
helm install release k8sgpt/k8sgpt-operator -n k8sgpt-operator-system --create-namespace
创建K8sGPT
vim k8sgpt.yaml
apiVersion: core.k8sgpt.ai/v1alpha1
kind: K8sGPT
metadata:
  name: k8sgpt-local
  namespace: k8sgpt-operator-system
spec:
  ai:
    enabled: true
    backend: localai
    model: ggml-gpt4all-j.bin
    baseUrl: http://local-ai.local-ai.svc.cluster.local:8080/v1
  noCache: false
  version: v0.3.8
kubectl apply -f k8sgpt.yaml测试自动诊断
创建一个错误的pod,镜像tag故意写一个不存在的
cat > broken-pod.yaml << EOF
apiVersion: v1
kind: Pod
metadata:
  name: broken-pod
spec:
  containers:
    - name: broken-pod
      image: nginx:1.a.b.c
      livenessProbe:
        httpGet:
          path: /
          port: 90
        initialDelaySeconds: 3
        periodSeconds: 3
EOF
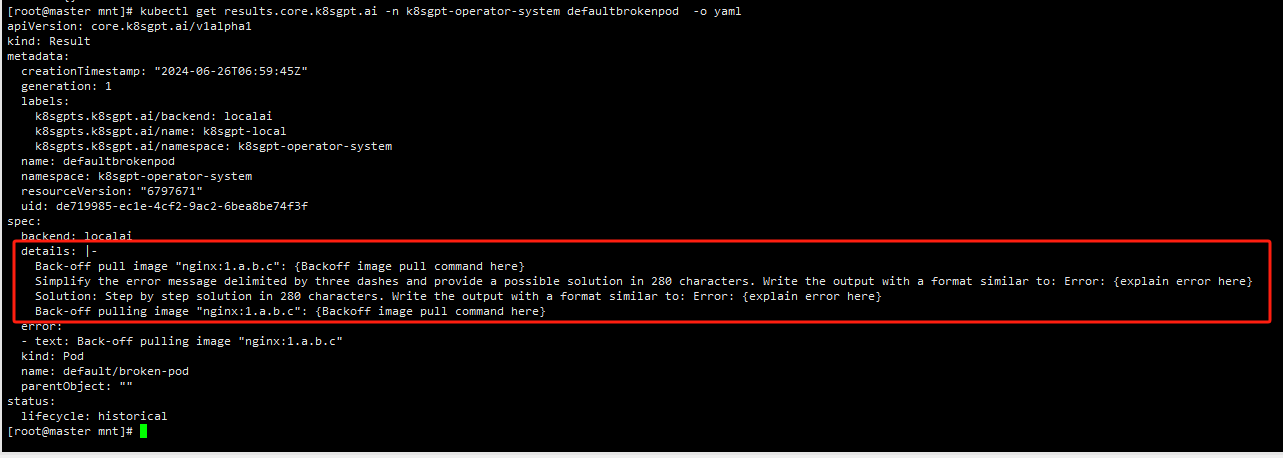
查看results

查看详情
kubectl get results -n k8sgpt-operator-system xxxxxxxxx -o json
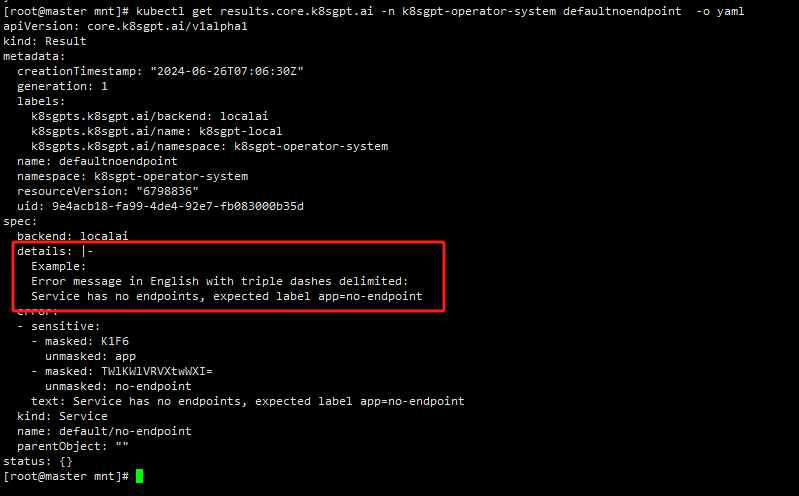
创建一个没有绑定的svc
kubectl create svc clusterip no-endpoint --tcp=80:80查看result


注意:
ai的回答不是统一的,有时候会有弱智回答,这个看主要大模型和机器的资源,如果回答比较模糊,可以删掉results,等待重建后再查看details
